DIY Photography Daily Life Art Music Outfits Image Map
Showing posts with label Daily Life. Show all posts

Monday, July 8, 2013

Nails ☯

You're the Ying to my Yang


Saturday, July 6, 2013

About Face ✺


Sorry that I'm mentioning this book so much, it's just that amazing!

Wednesday, July 3, 2013

Vitamins ✔

So I never really knew that much about vitamins, like how many different ones there are, what they can do to help you, and where you can find them. But I was re-reading my Lauren Conrad Beauty Book and it has this big chart of good vitamins that answered all my questions, so I thought I would share it with you guys! Go buy her book(s) right now because they are amazing and so helpful!


Monday, July 1, 2013

DIY Blog Love


DIY Color blocked popsicles, Here


DIY Watermelon Cake, Here


DIY Galaxy Print, Here


DIY Mason Jar Flower Shelf, Here


DIY Oreo Pudding Pops, Here


Wednesday, June 26, 2013


Here are some of my favorite recent DIYS:


1) How To Make The "XX" T-Shirt, Here

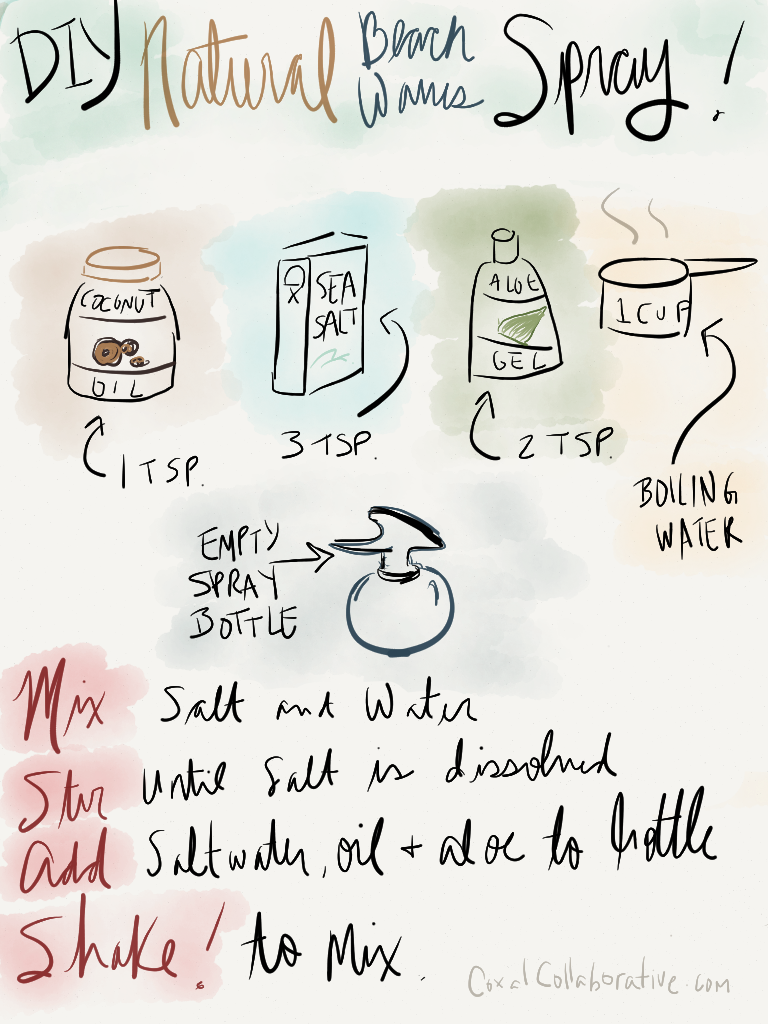
1tsp coconut oil + 3tsp sea salt + 2tsp aloe vera gel + 1 cup boiling water (*if you have thin or oily hair, use 1/2tsp coconut oil)

2) Natural Beach Waves Spray, Here


3) Retro Bottle Cap Magnets, Here


4) Giant Sunflower, Here


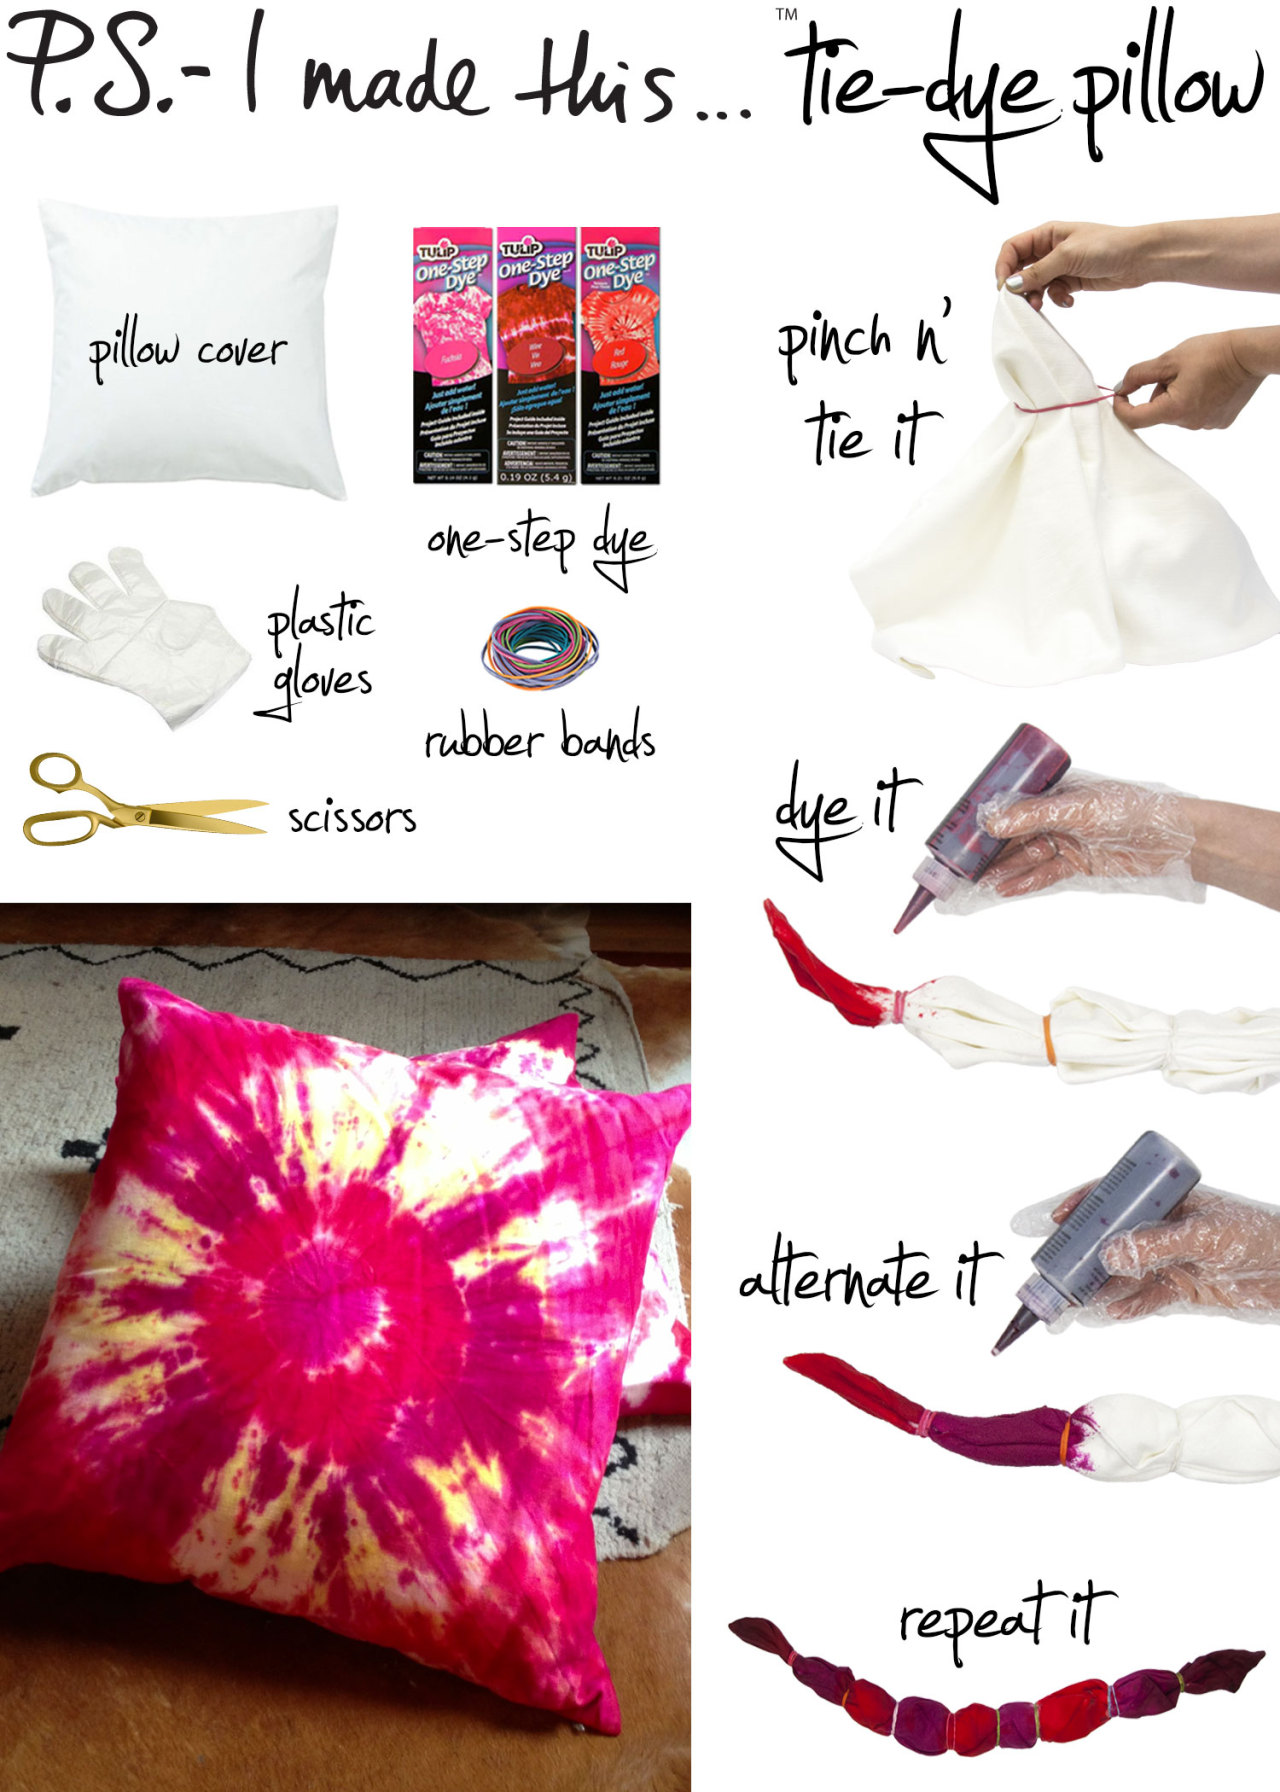
When it comes to the language of home décor, we’re all about speaking with an accent…in this case we’re talking fab tie-dye patterns that scream fun anywhere you choose to put them. Give some old throw-pillows a throwback makeover with this seventies-inspired print that never goes out of style! 


To create: For a bullseye pattern, pinch top layer of fabric from the center of the pillow cover. Next, wrap a rubber band around every 2 to 4 inches of the fabric, creating sections to block out the dyes and create the pattern. Wearing gloves, mix dyes as directed on the package. Over a sink, squeeze dye onto both sides of the cover, alternating colors on each section. Wring out excess liquid and allow the colors to set for 10 minutes. Use scissors to snip rubber bands. Lay cover flat on paper until dry, then insert a pillow. P.S.- wash pillow covers separately the first few times and don’t allow the dyed fabric to rest wet on other items!

 
Get down with DIY and a dope playlist
CLICK HERE for the P.S.- I made this… Playlist
Curated by The Jane Doze

 P.S.- tie dye nails from chalkboardnails
 

5) Tie-Dye Pillow, Here